Building a Model Context Protocol (MCP) Server
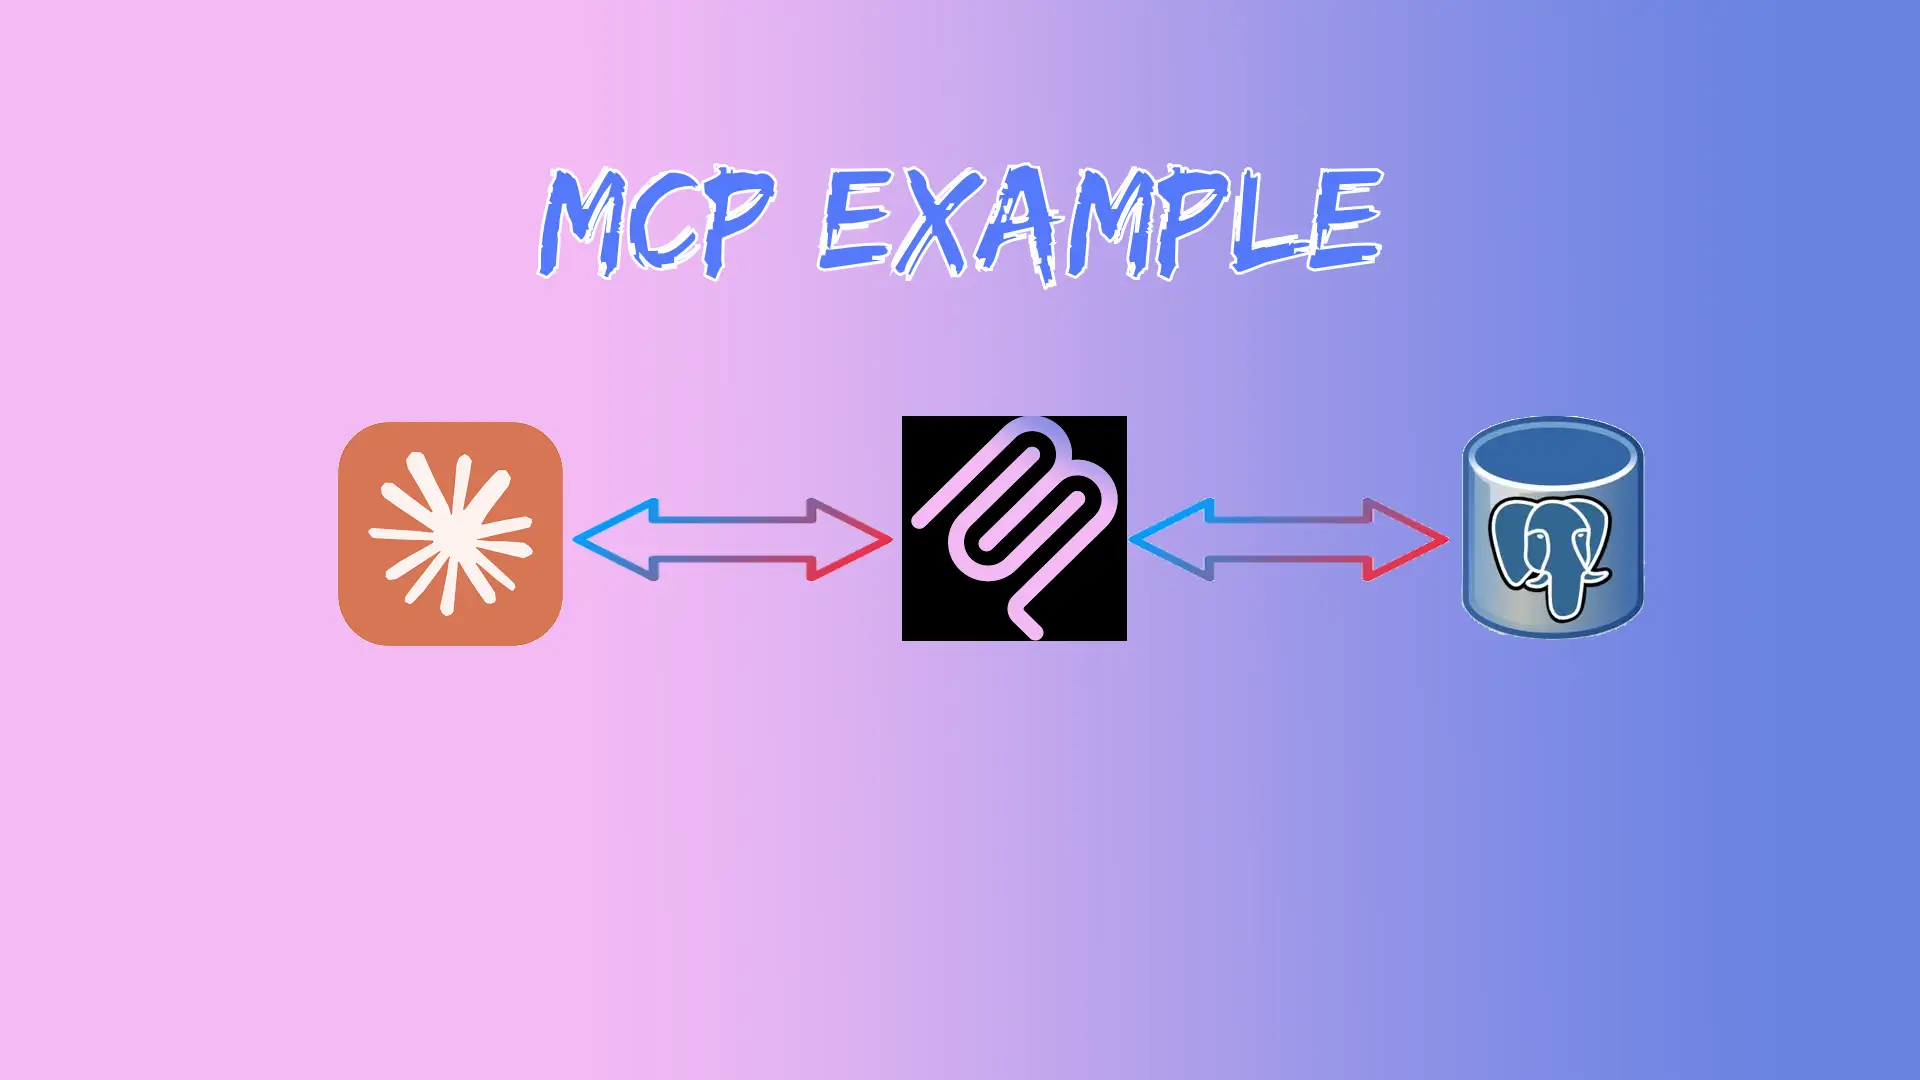
The Model Context Protocol (MCP) is revolutionizing how AI assistants interact with external systems and data sources. Instead of being limited to their training data, AI models can now access real-time information and perform actions through MCP servers. In this guide, we'll build a MCP server for employee management that integrates with data sources like a PostgreSQL database.
What is MCP and Why Should You Care? 🤔
MCP is an open protocol that enables AI assistants like Claude to connect to external data sources and tools. Think of it as a bridge between AI and your applications - allowing the AI to read databases, call APIs, and perform complex operations on your behalf.
Key Benefits:
- Real-time Data Access: AI can query live databases instead of relying on static training data
- Action Execution: Perform operations like creating records, sending emails, or triggering workflows
- Extensibility: Add new capabilities to AI assistants without retraining models
- Security: Controlled access with proper authentication and validation
What We'll Build 🏗️
Our employee management MCP server will provide these powerful tools:
- get_employee_info - Retrieve detailed employee information
- get_employee_leaves - Check leave balances and allocations
- get_employee_leave_applications - View leave application history
- apply_employee_leave - Submit leave requests with validation
- get_all_employees - Admin function to list all employees
Prerequisites 📋
Before we start, make sure you have:
- Node.js (v18 or higher)
- PostgreSQL (v12 or higher) or Docker
- Claude Desktop app installed
- Basic knowledge of TypeScript and SQL
Step 1: Setting Up the Project 🚀
Create the MCP server using the official TypeScript template:
npx @modelcontextprotocol/create-server employee-server
cd employee-server
npm install pg @types/pg dotenv
This creates a well-structured project with all the necessary MCP server boilerplate and PostgreSQL dependencies.
Step 2: Database Setup with Docker 🐳
If you have Docker, start a PostgreSQL container:
docker run --name postgres -e POSTGRES_PASSWORD=postgres -p 5432:5432 -d postgres
Create the database and tables:
docker exec -it postgres psql -U postgres -c "CREATE DATABASE employee_management;"
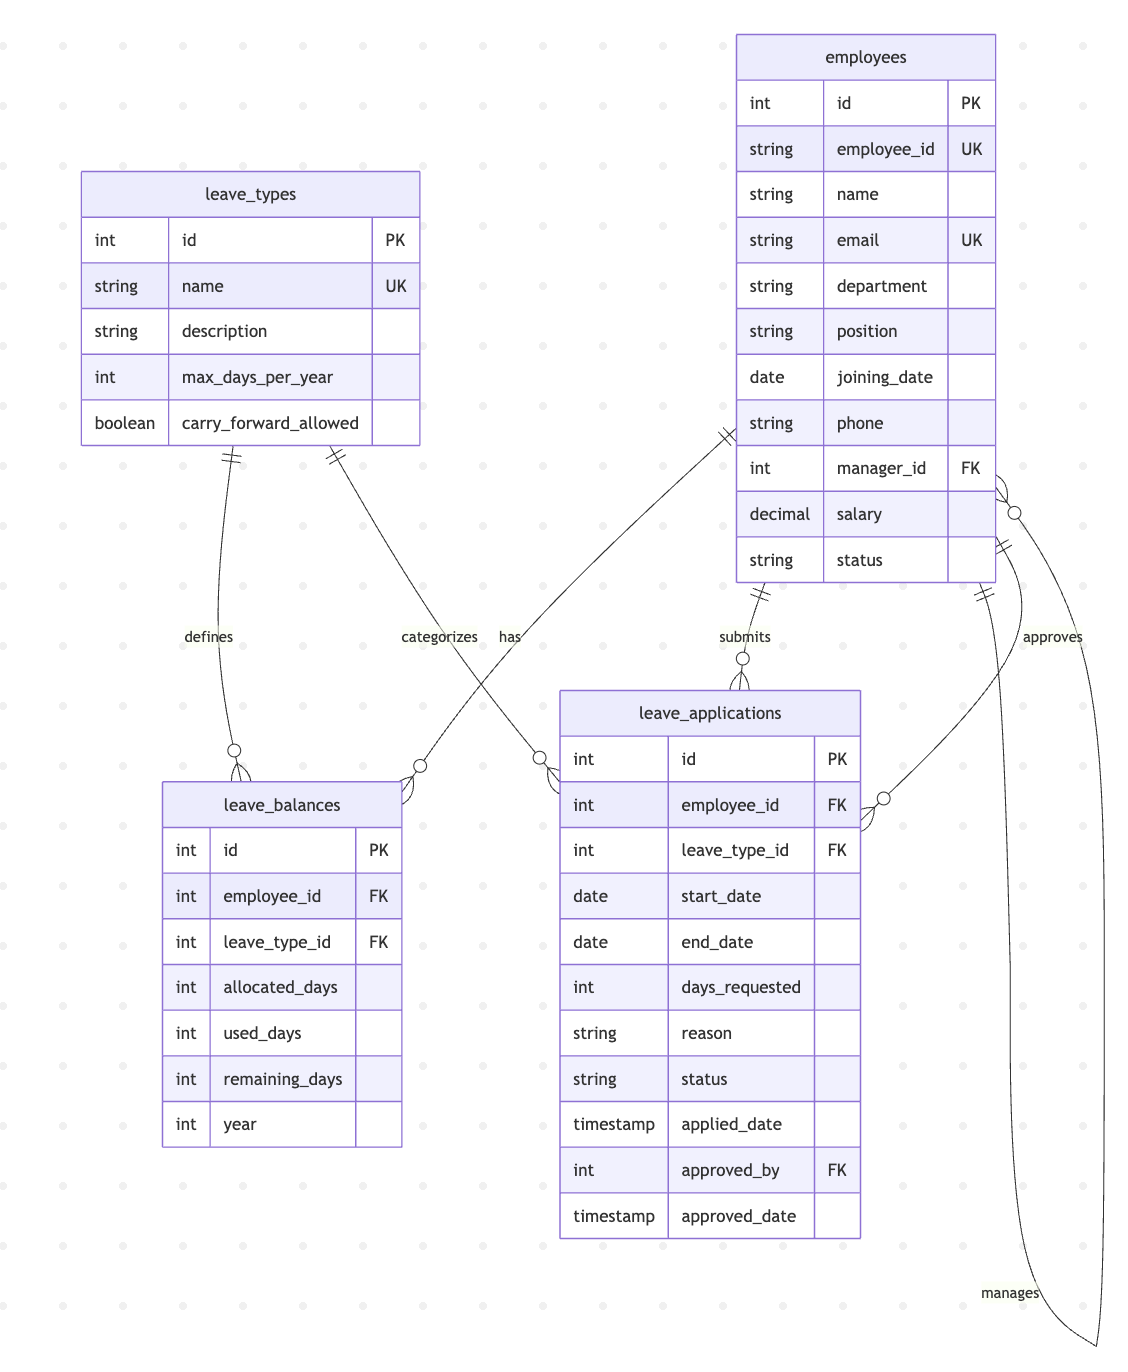
docker exec -i postgres psql -U postgres -d employee_management < database/setup.sql
The setup script creates 4 tables (employees, leave_types, leave_balances, leave_applications) and inserts sample data including 8 employees across different departments.
Step 3: Environment Configuration ⚙️
Create a .env file with your database credentials:
cp .env.example .env
Update the .env file with your database connection details:
DB_HOST=localhost
DB_PORT=5432
DB_NAME=employee_management
DB_USER=postgres
DB_PASSWORD=postgres
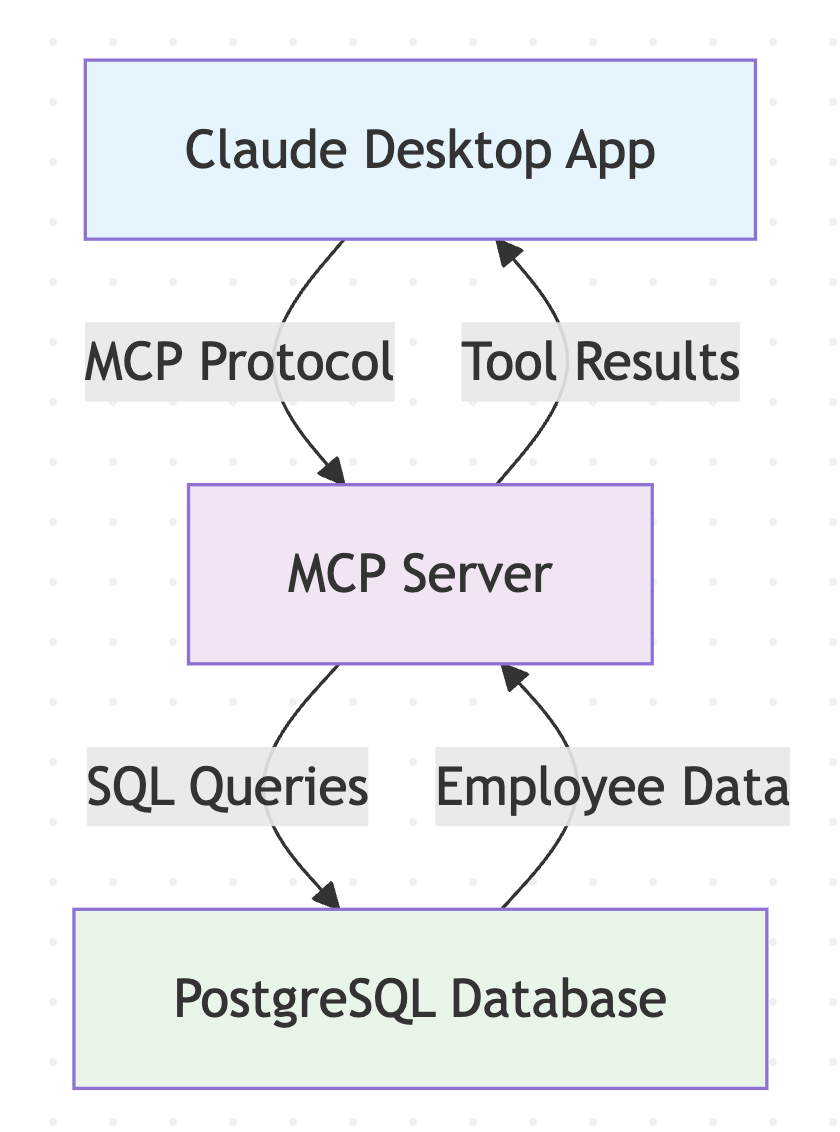
Step 4: Building the Server 🔨
The project structure includes:
- Database layer: Connection pooling and query utilities
- Service layer: Business logic for employee operations
- MCP tools: Tool definitions and request handlers
Build the TypeScript project:
npm run build
Test the server connection:
node build/index.js
You should see: "Database connection successful" and "Employee Management MCP server running on stdio"
Step 5: Claude Desktop Integration 🤖
Configure Claude Desktop to use your MCP server. Edit the configuration file:
macOS:
code ~/Library/Application\ Support/Claude/claude_desktop_config.json
Note: If you select yes to Would you like to add this server to Claude Desktop option, you can skip above step.
Windows:
code %AppData%\Claude\claude_desktop_config.json
Add your server configuration:
{
  "mcpServers": {
    "employee-server": {
      "command": "node",
      "args": ["/absolute/path/to/employee-server/build/index.js"],
      "env": {
        "DB_HOST": "localhost",
        "DB_PORT": "5432",
        "DB_NAME": "employee_management",
        "DB_USER": "postgres",
        "DB_PASSWORD": "postgres"
      }
    }
  }
}
Important: Use the absolute path to your project directory.
Step 6: Testing the Integration 🧪
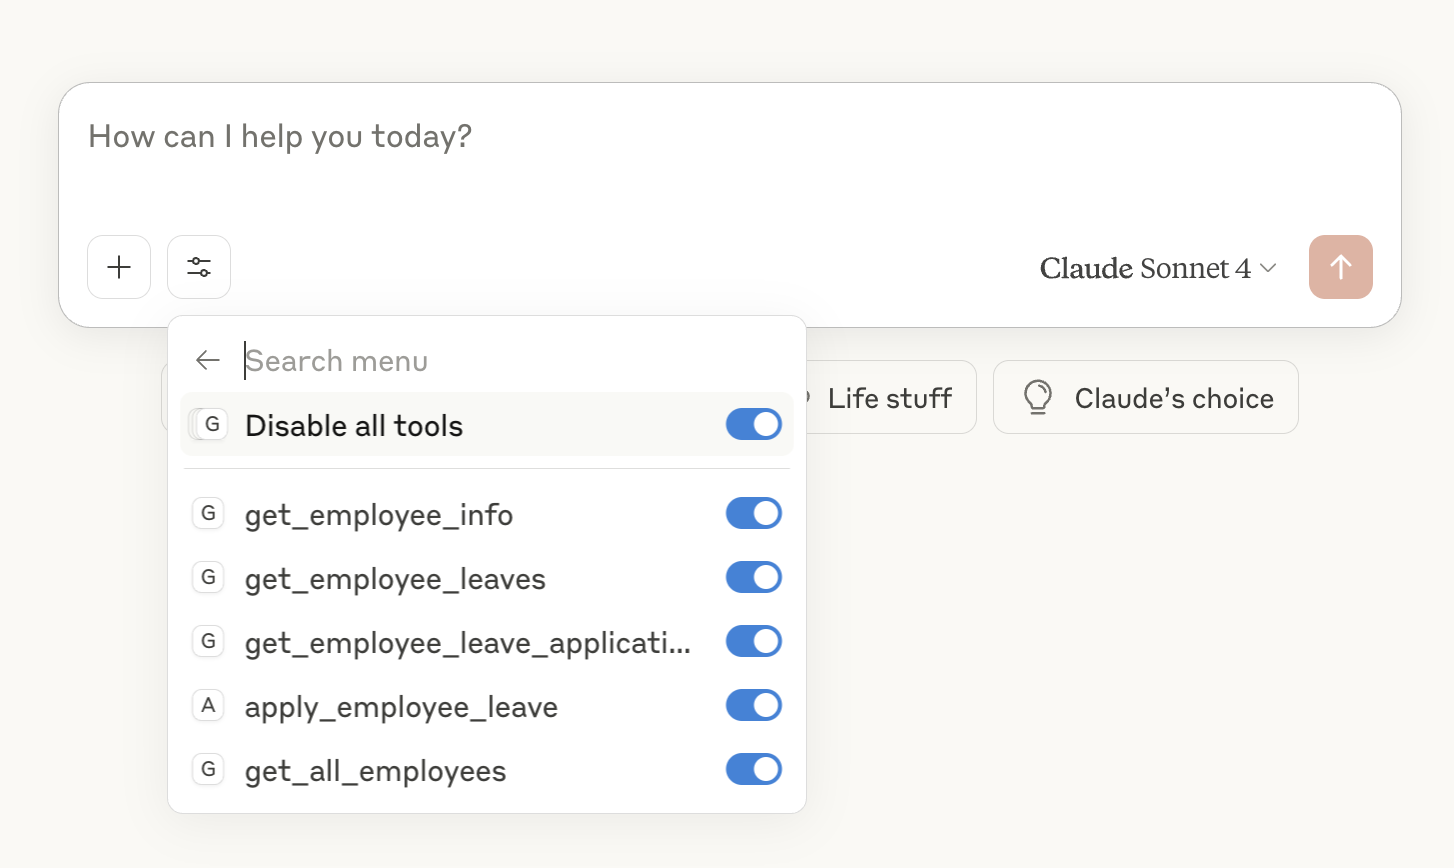
Restart Claude Desktop completely. You should now see the MCP tools available in the interface.
Test with these commands:
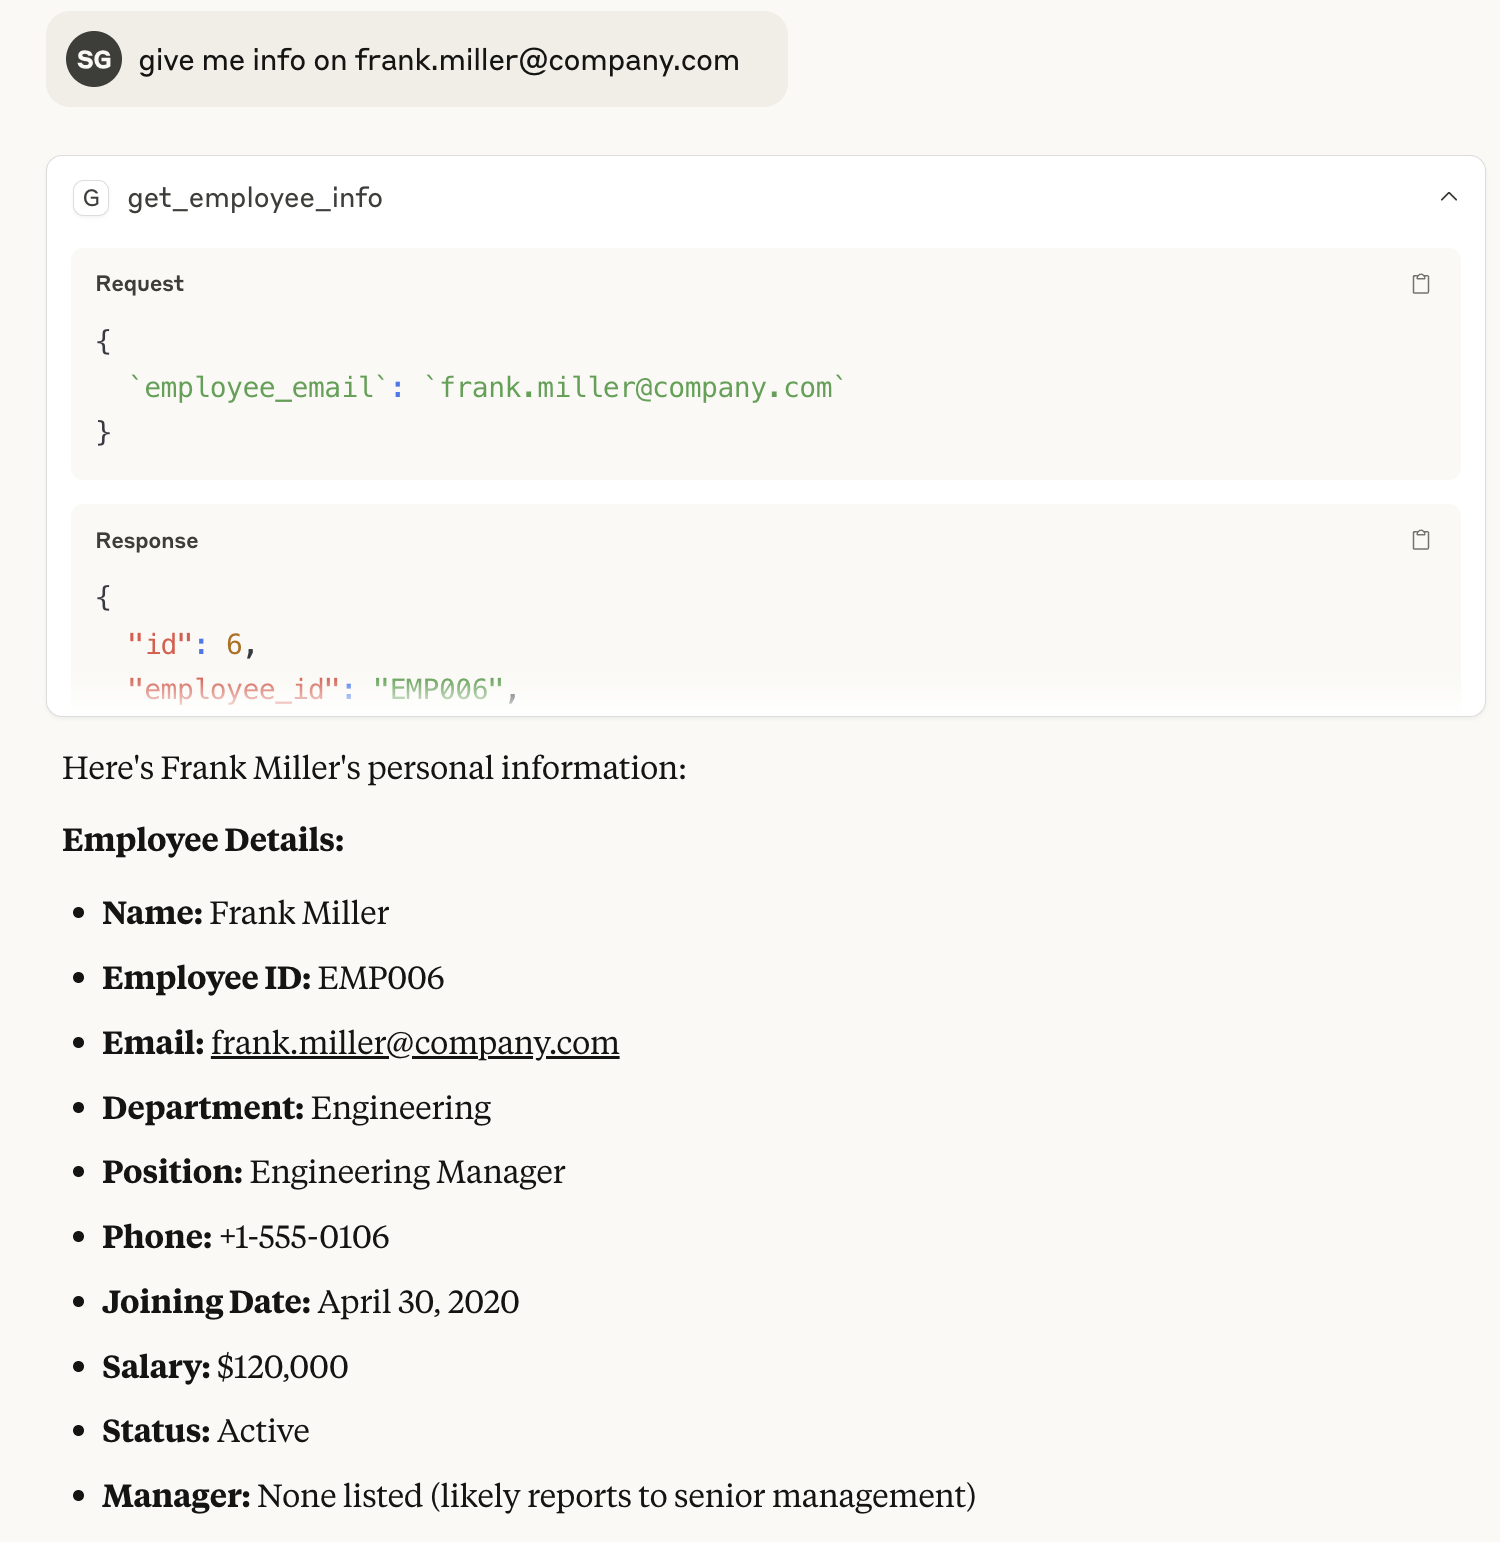
- "Get information for employee frank.miller@company.com"
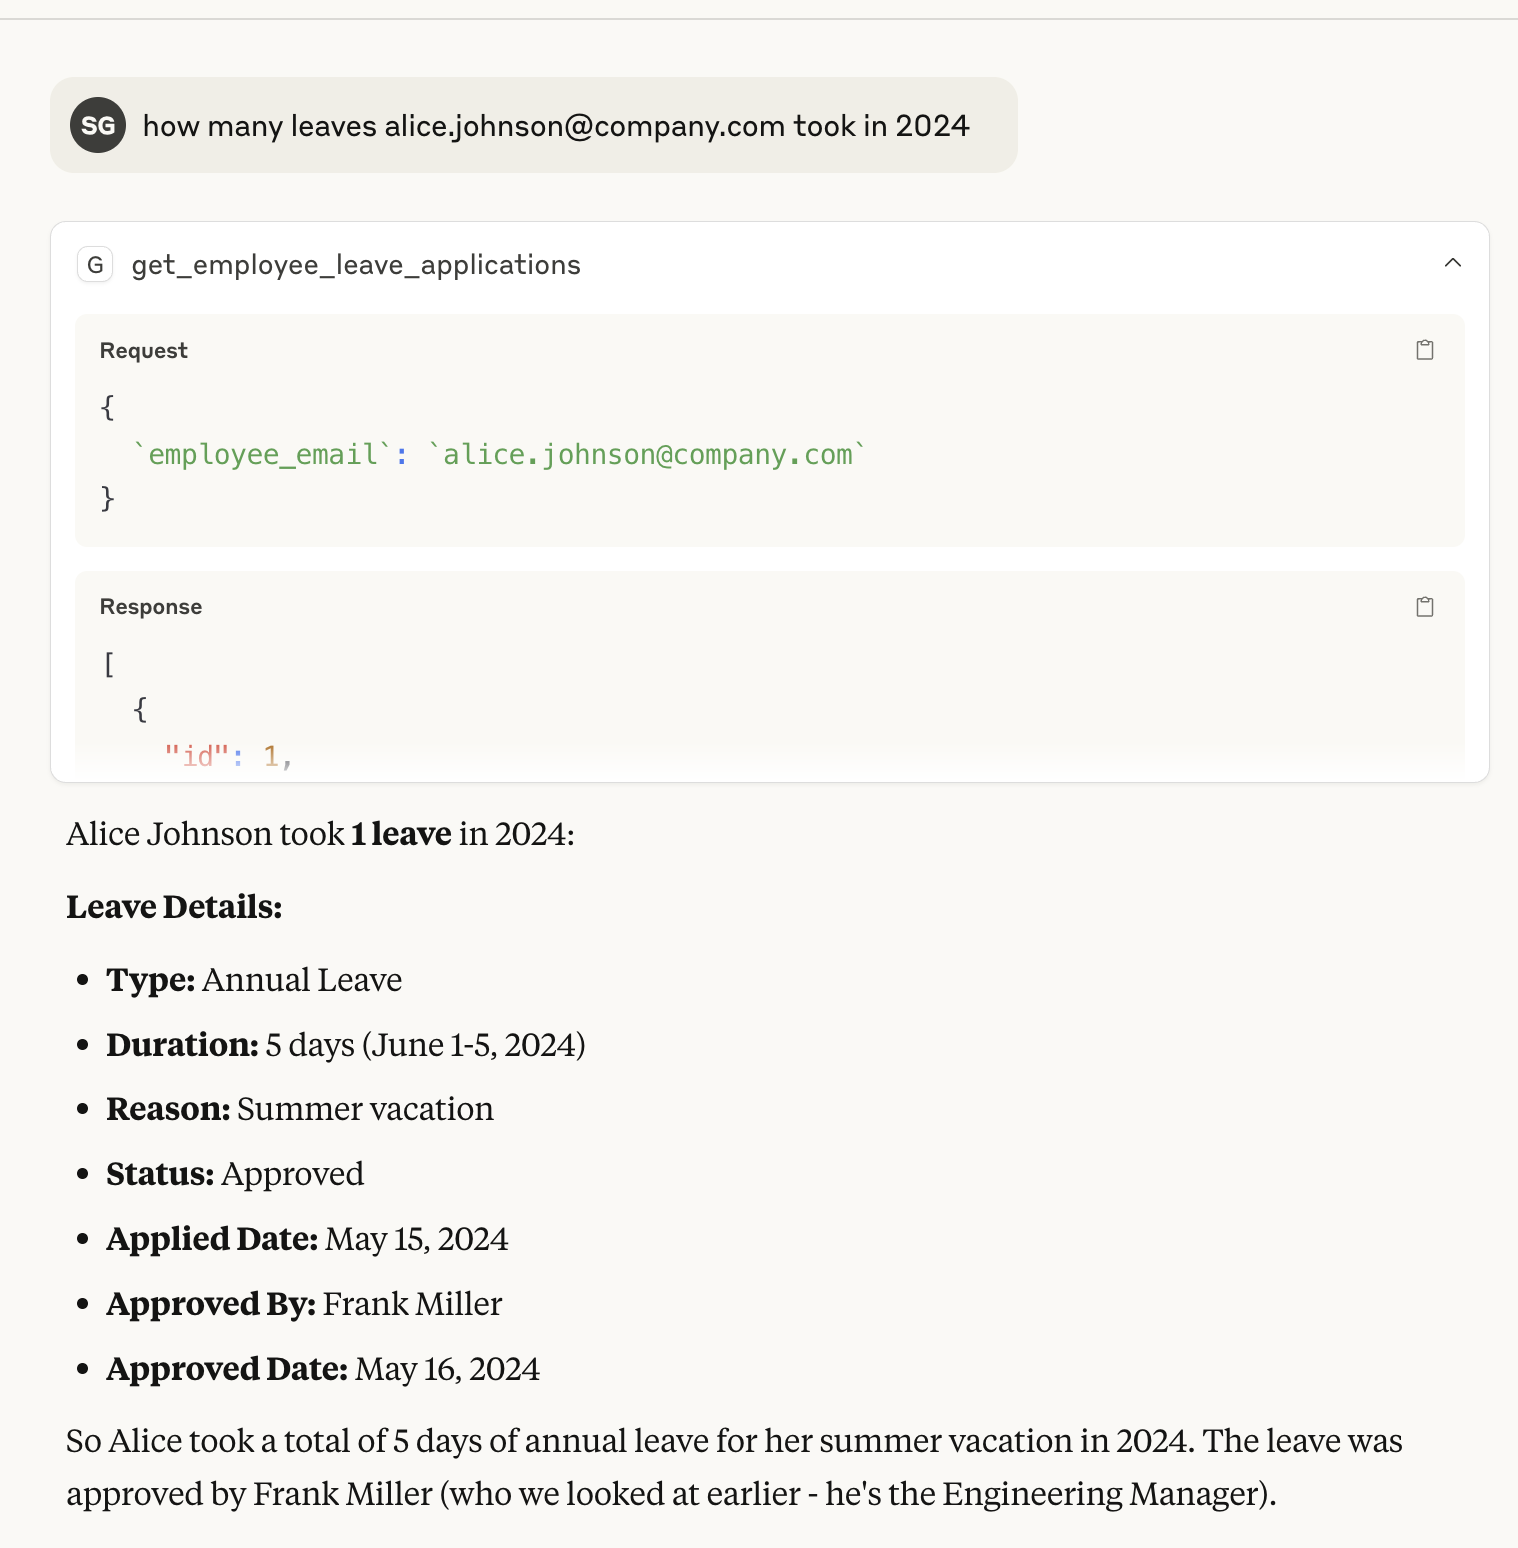
- "What are the leave balances for alice.johnson@company.com?"
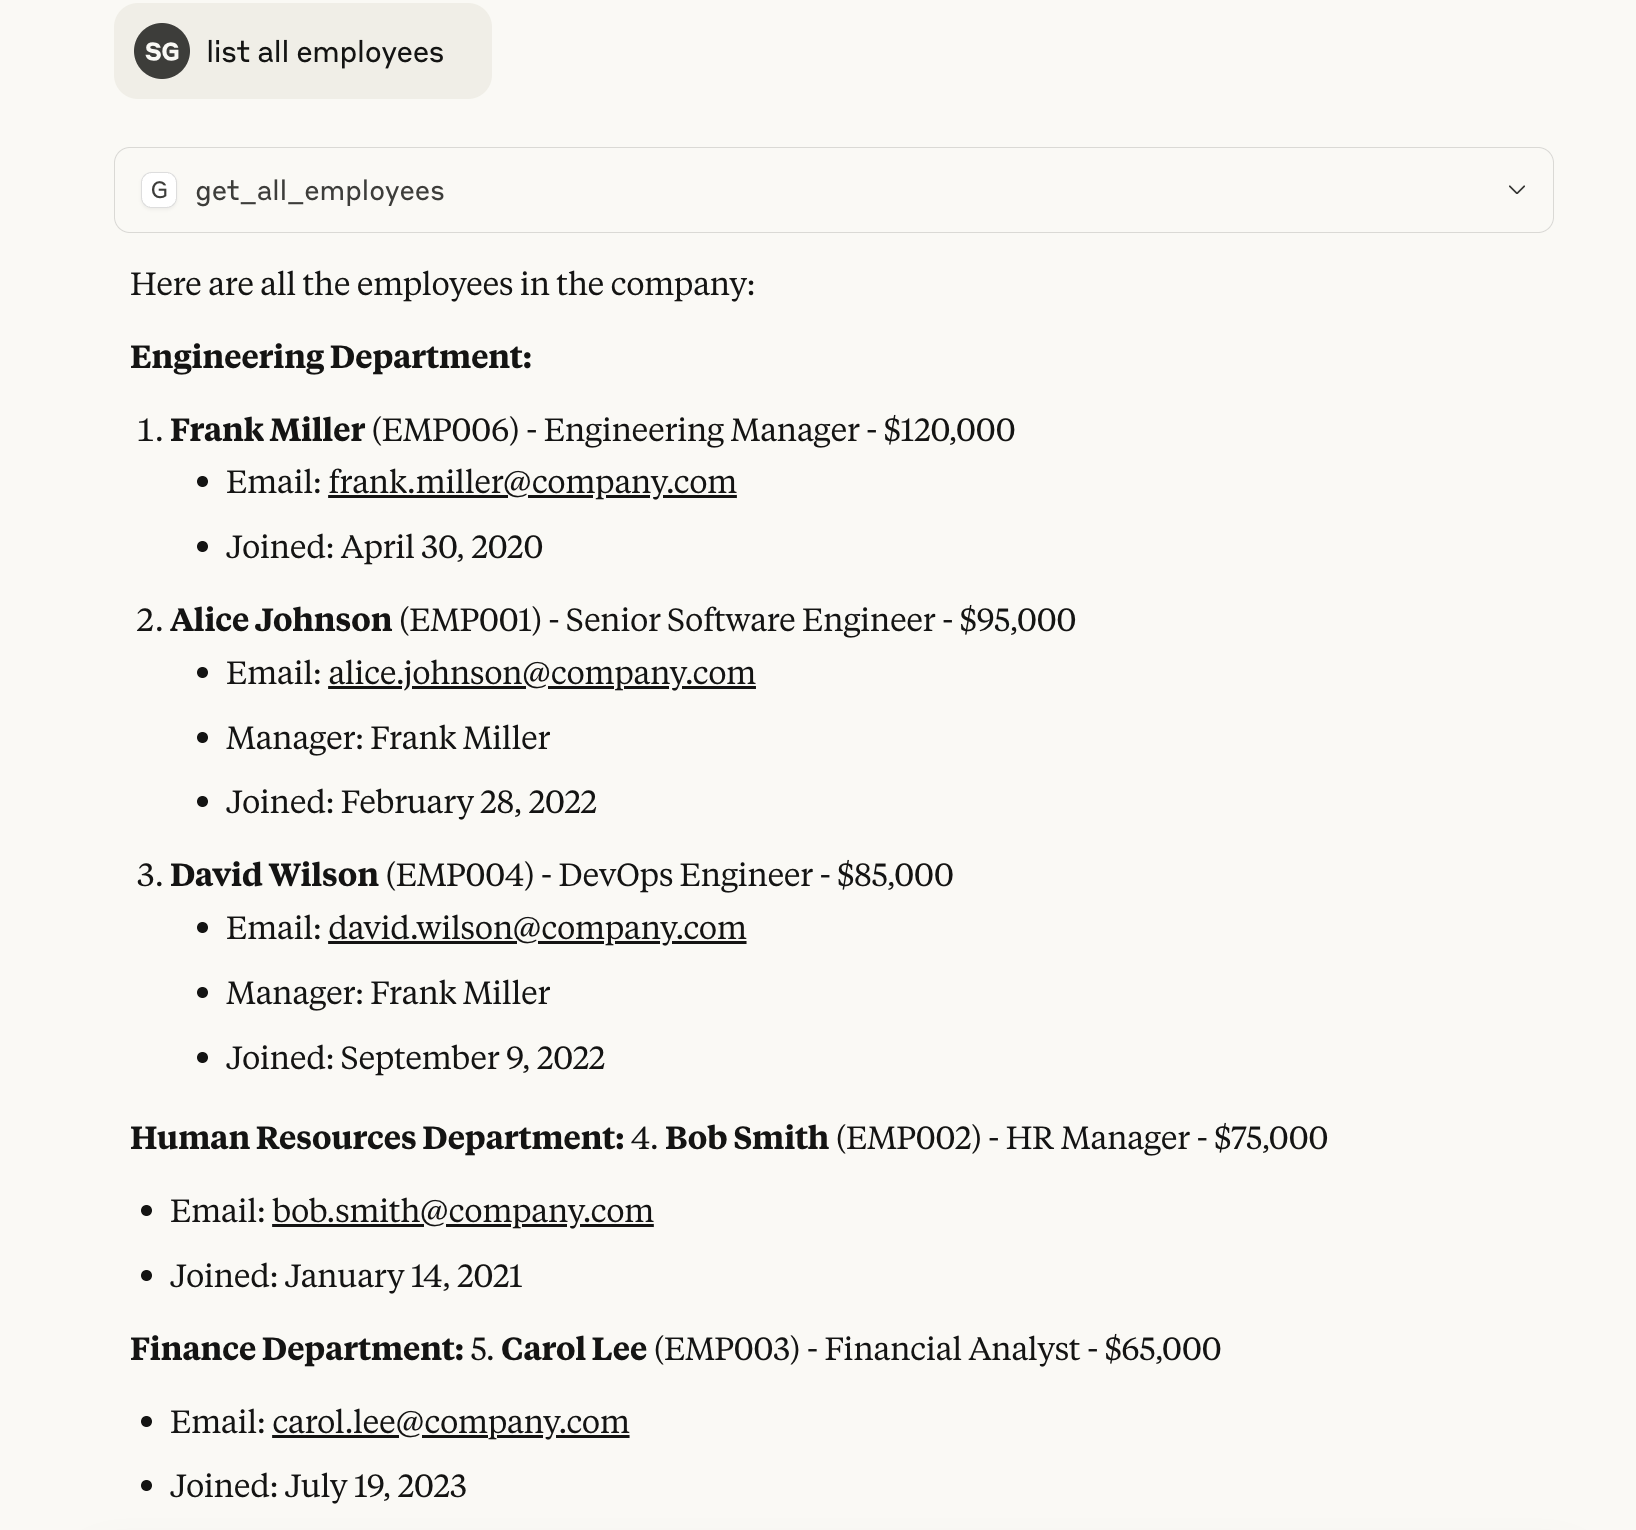
- "Show me all employees"
- "Apply for annual leave for alice.johnson@company.com from 2024-09-01 to 2024-09-05"
Troubleshooting Common Issues 🔧
Server not appearing in Claude Desktop:
# Check Claude Desktop logs
tail -f ~/Library/Logs/Claude/mcp*.log
Database connection issues:
# Test PostgreSQL connection
psql -h localhost -p 5432 -U postgres -d employee_management -c "SELECT COUNT(*) FROM employees;"
Build errors:
# Clean and rebuild
rm -rf build/
npm run build
Conclusion ✅
Building an MCP server opens up powerful possibilities, So do keep this in mind when you are building your next application
MCP servers have the following advantages:
- Connect AI assistants to your systems
- Integrate AI with existing databases
- Implement complex business logic
- Provide secure, validated operations
- Create custom tools